Python extensions
- How to
- 3 minutes
Requirements
- You have installed Python 3.10.
- You're running Dynatrace 1.286 version or later.
- You have
dt-extensions-sdk[cli]installed and in yourPATH.
Check you've installed the dt-extensions-sdk in your PATH by running dt-sdk --version on your terminal.
Steps
To migrate an existing Python EF1 extension using Visual Studio Code, follow these steps:
- Create a new EF2 extension.
- Import the EF1 extension using the
Dynatrace extensions: Convert Pythoncommand. - Convert the code, moving the class from the original extension to the new extension's
__main__.pyfile.
Create a new EF2 extension
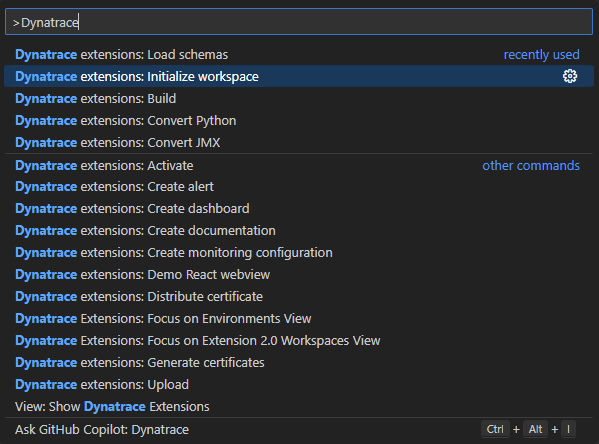
- Open an empty folder in Visual Studio Code, then run the
Dynatrace extensions: Initialize Workspacecommand. - Select the schema version (latest recommended) and the certificates you want to use to sign the extension.

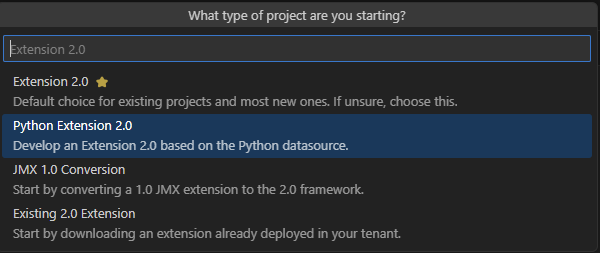
- Choose the
Python Extension 2.0project type. - Give your extension a name; it must respect the Python module naming convention using all lowercase with optional underscores.

Import the existing EF1 extension
The first step is to convert the old plugin.json file to the new activationSchema.json format.
This automatically creates the Settings 2.0 UI for your extension, which defines the UI for the user to configure the extension.
Run the command Dynatrace extensions: Convert Python.
You can choose to import an existing Python extension from:
- The extension zip file
- The plugin.json file
- Your Dynatrace environment
In this example, we're importing from a Dynatrace environment, which gives you a list of all Python extensions in that environment.
If you would like to import from your computer, a file picker will open, and you can select your extension's ZIP file or plugin.json file.
After you select an extension, your activationSchema.json will be overwritten with the correct settings. You'll need to review that file to ensure your UI looks the way you want it to.
When importing a local OneAgent extension, delete the entry activation > remote from the extension.yaml file.
However, when importing a remote ActiveGate extension, delete activation > local.
You can also make your extension work remotely and locally by keeping both entries and modifying the activationSchema.json file accordingly.
Change the extension code
Move your existing extension code to the __main__.py file of the new extension.
The easiest way to do this is by pasting the code from your existing extension class into the new ExtensionImpl class.
Here are the most significant changes you need to make to your code:
Code conversion reference
| Description | EF1 method | EF2 method | Notes |
|---|---|---|---|
| Logging | self.logger.info("message") | self.logger.info("message") | Stays the same |
| Obtaining user defined parameters | self.config.get("param_name", "default_value") | self.activation_config.get("param_name", "default_value") | You can find and replace all self.config. entries with self.activation_config. |
| Report an event | self.results_builder.report_custom_info_event | self.report_dt_event | Try to keep topology (groups, device, IDs) out of the code; this is defined later in the extension.yaml file. |
| Report a metric | device.absolute("metric_key", metric_value, {"dimension_name": "dimension_value"}) | self.report_metric("metric_key", metric_value, {"dimension_name": "dimension_value"}) | There is no concept of a device in the Python code anymore; send metrics directly. |
| Create groups and custom devices | self.topology_builder.create_group, group.create_device | n/a | Doesn't exist; topology is defined in the extension.yaml file. |
Build and upload the extension
Build the extension by running the command Dynatrace extensions: Build.
If the build is successful, you'll see a prompt to upload the extension to your Dynatrace environment and activate it.
Accept both prompts.
Your extension is now uploaded to Dynatrace, and you can create monitoring configurations to start monitoring.