Commands reference
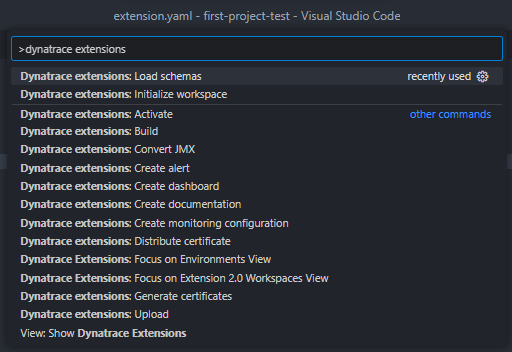
All major workflows automated by the Dynatrace Extensions add-on are exposed as VS Code commands and accessible from the editor's command palette. To open the command palette, press the F1 key, where you can find all available commands with the Dynatrace extensions prefix.
Command overview
| Command | Description |
|---|---|
| Initialize workspace | Register and initialize your workspace. The first step to get started |
| Load schemas | Download schema files and setup manifest validation |
| Generate certificates | Generate developer certificates for signing extensions |
| Distribute certificate | Distribute your CA certificate to components that use it |
| Build | Build your extension and create a signed package |
| Upload | Upload the latest extension package to your Dynatrace environment |
| Activate | Activate a version of the current extension |
| Create documentation | Generate a README.md file about the extension and its contents |
| Create a dashboard | Generate a landing page dashboard to bundle with your extension |
| Create alert | Generate metric events for alerting to bundle with your extension |
| Convert JMX | Convert a Java management extensions (JMX) extension to the 2.0 framework |
Initialize workspace
This command initializes a new or existing workspace for Extension 2.0 development and registers it with our VS Code add-on. As part of initialization, a starting folder structure and some template extension files are created to help any project start correctly.
You can explore this command in detail by visiting our Getting started guide.
Command prerequisites
- A workspace or folder needs to be opened in the VS Code window.
- You need to be connected to a Dynatrace environment.
Workflow steps
- Provisions internal storage for this project.
- Invoke the workflow from Load schemas. You can skip this step if you have already registered your workspace with Dynatrace Extensions.
- Associate certificates with the workspace. Allow choice:
- Use existing: Checks settings for developer certificate and key.
- Generate new ones: Invokes workflow from Generate certificates.
- Register the workspace with Dynatrace Extensions.
- Create a project folder and files based on the chosen template.
Project templates
Extension 2.0
It's the default choice. Whether you already have all the contents and want to register the workspace with our add-on or start a new extension from scratch. It'll generate the extension folder and a manifest with the minimum mandatory details required for any extension.
Python extension 2.0
This option creates a new extension that uses the Python data source. As part of the setup, we'll also download and install the Dynatrace Extensions SDK module for Python.
JMX 1.0 conversion
The JMX data source is now available with Extensions 2.0, meaning it's time to convert your JMX extensions from the 1.0 framework. This type of project will guide you to provide a 1.0 JMX Extension (either from a local file or your tenant), and it will convert it to the new framework and create your manifest.
Existing 2.0 extension
Need to edit an already deployed extension? Are you curious about what the content of a Dynatrace-built extension looks like? This option downloads an extension 2.0 package from your tenant and unpacks it into your workspace.
Load schemas
This command downloads schema files of a specific version from your connected Dynatrace environment and sets up validation for the extension manifest. If your project already has an extension manifest, this is updated with the chosen version.
Command prerequisites
- You need to be connected to a Dynatrace environment.
Workflow steps
- Your Dynatrace environment is queried for the list of available schema versions. And you'll be prompted to select which version to use.
- The files associated with the selected schema version are downloaded and stored in the global Visual Studio Code storage.
- If you have downloaded the files before, you'll be prompted and can skip this step.
- Workspace settings are updated to enable validation of your extension manifest with the selected schema.
- If a manifest file is present in the workspace, it will be updated with the selected minimum version.
Generate certificates
This command generates all the credentials needed for signing and validating Extensions 2.0.
Command prerequisites
- A workspace or folder needs to be opened in the VS Code window.
Workflow steps
- An RSA key pair is generated to generate your CA certificate.
- Another RSA key pair is generated, then used to generate your developer certificate, adding your CA certificate as the issuing authority on this credential.
- The developer certificate is generated from the RSA key pair, and the CA certificate is added as the issuing authority on this certificate.
- Note: You can customize all details used for generating these certificates through the settings.
- All intermediary files are stored in the VS Code workspace storage, and the credential settings for this workspace are updated with the paths to the generated files. And this is done in the
./vscode/settings.jsonfile. - Invoke workflow from Distribute certificate
Distribute certficate
This command uploads the workspace's CA certificate to the Dynatrace Credentials Vault. Additionally, if it detects locally installed OneAgents or ActiveGates, it also uploads this certificate to them.
Command prerequisites
- A workspace or folder needs to be opened in the VS Code window.
- You need to be connected to a Dynatrace environment.
- The
dynatraceExtensions.rootOrCaCertificatesetting needs to be set either globally or for the workspace.
Workflow steps
-
The add-on checks whether a Dynatrace Credentials Vault entry ID is already associated with this workspace and prompts whether the entry should be overwritten.
- If overwrite is selected, the entry is updated with the new file.
- Otherwise, the workflow continues with creating a new Credential Vault entry.
-
You are prompted to provide a name for this credential and an optional description. Then the file is uploaded with these details.
-
Local OneAgent and ActiveGate paths are checked for existence, and the flow prompts whether the certificate should also be uploaded to these locations.
- On Windows:
- OneAgent:
%PROGRAMDATA%\dynatrace\oneagent\agent\config\certificates - ActiveGate:
%PROGRAMDATA%\dynatrace\remotepluginmodule\agent\conf\certificates
- OneAgent:
- On Linux:
- OneAgent:
/var/lib/dynatrace/oneagent/agent/config/certificates - ActiveGate:
<CONFIG>/remotepluginmodule/agent/conf/certificates/
- OneAgent:
NoteThis step requires VS Code to run with administrator-level permissions. For example, for Windows, use Run As Administrator.
- On Windows:
Build
This command builds your extension and bundles it into a signed ZIP file archive, then places it in the dist folder of the workspace.
Command prerequisites
- A registered workspace needs to be open in the VS Code window.
- Developer certificates need to be associated with the workspace.
- No error/problems need to be detected with the extension manifest.
Workflow steps
- The extension version is picked up from the manifest. If you're connected to a Dynatrace environment, the version is checked for conflicts and automatically incremented if needed.
- The extension manifest and assets are bundled into a ZIP file archive signed using your developer credentials. The resulting signature and the archive are added to a final ZIP file representing the extension package.
- If you're connected to a Dynatrace environment, the package is validated against it. Any validation errors are communicated in an Output Channel (within your editor window), and the workflow terminates. Only valid packages are moved to your workspace's
distfolder. - Invoke workflow from Upload.
Upload
This command uploads the most recent package from your workspace's dist folder to your connected environment.
Command prerequisites
- A registered workspace needs to be open in the VS Code window.
- You need to be connected to a Dynatrace environment.
- A ZIP file archive needs to be in the workspace's
distfolder.
Workflow steps
- We check if an upload is possible by querying the number of versions already deployed for this extension.
- If too many versions exist, you'll be prompted to remove the oldest one.
- The add-on attempts to remove the oldest version; however, if this fails (for example, monitoring configurations may be linked to it), you'll be prompted to choose a different version to remove.
- When it's possible, the extension is uploaded.
- Invoke workflow from Activate to activate this version.
Activate
This command activates a version of your workspace's extension.
Command prerequisites
- A registered workspace needs to be open in the VS Code window.
- You need to be connected to a Dynatrace environment.
Workflow steps
- The extension name is read from the manifest in your workspace.
- Your Dynatrace environment is queried for the available versions of the extension, and you'll be prompted to choose which one to activate.
- This step is skipped when the command is invoked from another workflow. For example, Upload
- The chosen version is activated in your Dynatrace environment.
Create documentation
This command automatically generates rich documentation in a README.md file by analyzing the extension package and its contents.
Command prerequisites
- A registered workspace needs to be open in the VS Code window.
Workflow steps
- The command reads through the extension manifest, extracting all generic topology entities.
- Next, metrics are extracted from the manifest.
- Next, dashboards are extracted from the manifest.
- After that, alerts are processed into human-readable summaries.
- Metrics are mapped to feature sets and linked to the defined entities.
- The readme file is created, with missing information skipped as needed.
Create a dashboard
This command reads through the extension manifest and generates an overview dashboard which serves as a landing page for the extension.
Command prerequisites
- A registered workspace needs to be open in the VS Code window.
- The extension manifest needs to contain at least a topology definition.
Workflow steps
- The command extracts the generic entity types defined in your manifest and any metrics associated with them. The first one or two metrics are taken for each entity type.
- Your dashboard is created from a template containing the following:
- Single value tiles which show the count of distinct monitored entities.
- A list of markdown links so that each entity has a quick entry point to its unified analysis screen.
- Tables for each entity type, alongside graph charts based on associated metrics.
- Your dashboard is saved in the
./extension/dashboards/overview_dashboard.jsonfile, and the extension manifest is edited to include the reference to this asset. - The workflow finishes with the prompt to upload this dashboard to your Dynatrace environment.
Note
Your dashboard will automatically be uploaded as part of the extension deployment. This final step is offered if you want an early preview of the asset before your extension deployment.
Create alert
This command creates a metric event based on metrics defined in your extension's manifest.
Command prerequisites
- A registered workspace needs to be open in the VS Code window.
- The extension manifest needs to contain metrics metadata.
Workflow steps
- The command parses your extension manifest and presents a selection box with all available metrics. Select one to continue.
- You are then prompted for a title for this alert.
- You need to choose whether your threshold breach happens when the metric goes above or below a given level.
- Finally, provide the actual value the alert threshold relates to.
- The command completes by writing your alert JSON file in the
./extension/alertsfolder and updating your extension manifest to include the newly generated alert.
Convert JMX
This command converts an existing JMX extension to Extension 2.0.
Workflow steps
- You're prompted on how the JMX extension should be loaded in:
- Locally - browse your filesystem and select a JSON or ZIP file containing the JMX extension.
- Remotely - browse JMX extensions available on your connected tenant.
- You're prompted to select a process technology if one can't be detected automatically.
- You're asked whether to include the data on your host's details page.
- The workflow processes the JMX extension JSON file and converts it to an equivalent extension 2.0 manifest.
- The workflow saves the generated manifest at
extension/extension.yamlor prompts you for a save destination if this folder doesn't exist in your workspace.
You can explore this workflow as part of our JMX 1.0 Conversion guide.