Getting started
Get started with Dynatrace Extensions by following this guide to set up your Visual Studio Code editor and get your first extension built and uploaded to Dynatrace in 5 minutes.
Before you begin
Installation
You can find Dynatrace Extensions in the Visual Studio Code marketplace. Install it from there or via the VS Code extension search.
Access token
Our VS Code add-on automates many operations around Extension 2.0 development by using the Dynatrace API.
To get the most out of it, create an API Access Token with the following scopes:
WriteConfigReadConfigcredentialVault.readcredentialVault.writeextensions.readextensions.writeextensionEnvironment.writeextensionEnvironment.readextensionConfigurations.readextensionConfigurations.writemetrics.readentities.readsettings.readsettings.write
The Dynatrace UI provides a dedicated template called Extension Development, which applies these exact token scopes.
Connectivity settings
This step is only required if your Dynatrace environment is accessible through a dedicated URL that uses a custom-signed or a self-signed SSL certificate.
In this situation, you need to adapt your settings before you can continue with this guide. Go to File > Preferences > Settings, expand on Extensions, and find the Dynatrace Extensions section. Scroll down until you see Tenant Connectivity Settings and select Edit in settings.json.

Register your dedicated environment URL in the file you've opened and either provide the path to your CA file or turn off SSL verification. For example:
{
  "dynatraceExtensions.tenantConnectivitySettings": [
    {
      "tenantUrl": "https://my.custom.dynatrace/e/abcd-123",
      "certificatePath": "/tmp/certificates/ca.crt"
    }
  ]
}
You can explore these settings in more detail here
Connect to Dynatrace
Begin by connecting with your Dynatrace environment. To connect, you need to do the following:
-
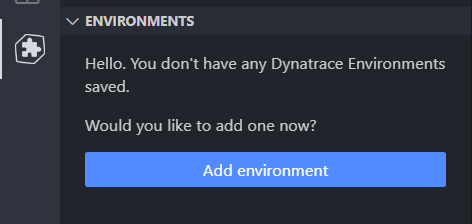
Go to the Dynatrace Extensions view in the VS Code UI, then select the Add environment button as shown.
You'll need to provide the base URL to access Dynatrace. It should follow one of these patterns:
https://<Id>.live.dynatrace.comfor SaaS environments.https://<Domain>/e/<Id>for Managed environments.https://<Id>.apps.dynatrace.comfor the latest Dynatrace Platform.
Note: Replace
<Id>with your environment ID and<Domain>with your managed environment domain. -
Provide the API Access Token you prepared earlier and optionally provide a label.
-
Set this as your current environment.
The add-on displays your environment in the list and will use the current environment for all API operations. Visit Environments to learn more about using the Environment view.
Initialize your workspace
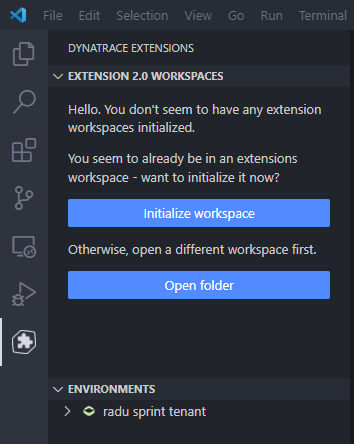
It's time to create your first project. If you need to open a different workspace folder, select Open folder. Otherwise, select the Initialize workspace button to start.
To learn how to use the Workspaces view, visit Extension 2.0 workspaces.
1. Schema validation
The workflow starts with your target schema version. Choose any from the list. It ensures that we can validate your extension manifest while you're writing it, allowing you to spot any issues early on.
2. Developer certificates
Extensions 2.0 use developer certificates for signing and packaging extensions. Choose Generate new ones to generate a new set of certificates kept in VS Code's storage.
Check the extension's settings to get the exact path to where your credentials are stored.
The workflow offers some additional convenience steps:
-
Whether to use these certificates as defaults for all workspaces:

- This will update your global settings for Dynatrace Extensions to reflect this choice.
- As part of this guide, choose Yes.
-
Whether to upload the new CA certificate to the Dynatrace Credentials Vault.

- You need to provide a name and, optionally, a description.
- As part of this guide, choose Yes and provide the additional details.
-
Whether to upload the new CA certificate to locally installed OneAgents and ActiveGates.
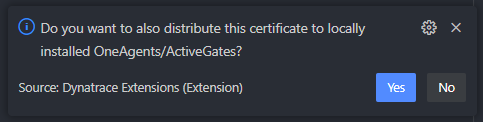
- This step only appears if a local OneAgent or ActiveGate installation is detected.
- This step requires running VS Code with Administrator privileges.
- As part of this guide, choose No.
To learn how to use your existing developer certificates, visit Credentials.
3. Project template
The final step of the workflow is to choose the type of project you want to start. It allows the extension to generate relevant files.
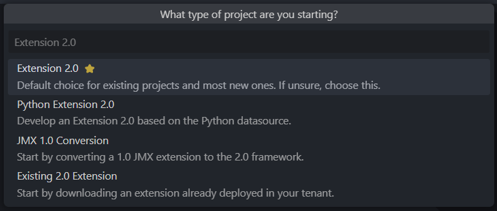
Since this is your first extension, choose Extension 2.0 ⭐ at this step.
This option is the default choice for new projects and will create the following starting setup:
extension- the folder where all extension assets are placed.extension/extension.yaml- this is your extension's manifest file.
To learn more about the other types of projects, visit Project templates.
In addition, all templates also create the following folders and files:
.vscode- a folder for storing workspace-specific VS Code settings.dist- a folder for storing all extension packages.config- a folder for storing your monitoring configuration files..gitignore- a file containing useful rules for ignoring unnecessary items from your git repository.
Make some changes to your extension
Start by opening up the extension manifest and making some changes. Give your extension a name, and add yourself as the author.
For example, update the extension/extension.yaml file with the following information:
name: custom:my.first.extension
version: "0.0.1"
minDynatraceVersion: "1.265.0"
author:
  name: <Your-Name>
Replace <Your-Name> with the author's name.
Publish your extension
Finally, perform the following steps to upload your extension to Dynatrace.
- Press the F1 key and choose the Dynatrace extensions: Build command. The workflow will build your extension, creating a package inside your
distfolder. - When prompted about uploading your extension to Dynatrace, choose Yes.
- When prompted about activating this extension version, choose Yes.
Congratulations. You created, built, uploaded, and activated your first Extension 2.0. You can view this in the Dynatrace UI by navigating to Extensions.